Earlier today, as I was reading through tatting blogs, I noticed that Jane Eborall had mentioned losing followers. I've also been losing followers this week, so I decided to see what I could find on the Google product forums. Turns out Google is doing a cleanup of blogger, and is removing followers who aren't using Google accounts (click here for the forum post). Just a heads up for those who are also noticing a decrease in followers, or who may be missing some blogs on your reading list.
Onto the tatting front:
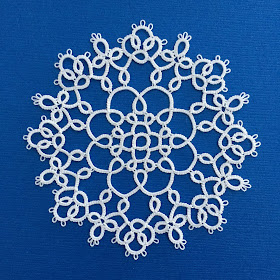
Like many on the East coast, I was snowed in over the weekend. I decided to use that time to make another coaster sized doily:
Actually, this version is quite small for a coaster, tatted in DMC size 80 and measuring only 3.25 inches across. Not to worry though, I had the perfect use for it:
These are my miniature books by Angeline Crichlow (author of "Let's Tat"). You can read more about them by clicking here. In my older blog post they were displayed on the first few rounds of the Jan Stawasz Monster Doily, which is now too big for that purpose. I've since put them on my bookshelf on top of my mini doily.
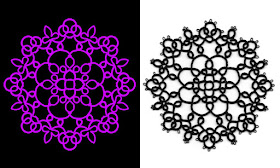
In size 40 thread, this miniature doily works out to be about 4 inches across, which is the same size as a coaster. Here is a side by side next to the drawing that inspired it:
The floating rings connecting the outer round to the second round made this doily a lot easier to design. That's because I could change the circumference quite freely by adjusting the size of the floating rings. (Adjustments to circumference are often required for creating a flat outer round). I'm thinking about making a few more designs and creating another pattern pack, this time for mini doilies/coasters. That should occupy me for the next month or so.
Pages
▼
Thursday, January 28, 2016
Friday, January 22, 2016
Like Puzzle Pieces
I'm not sure if I've ever written about designing being like placing pieces of a puzzle. It's something I think about often, especially when working with elements that don't quite fit into place. I've found that it's extremely helpful to make little bits of tatting to overlay on the offending part of the design. Like pieces of a puzzle, you can visualize what fits and what doesn't.
I decided to try something new with my last piece of tatting and truly work it backwards. I had been having trouble fitting a center into a pre-determined outer round and wanted to see if this would help.
I began by tatting a ring of 12 flowers, followed by one central flower:
I don't actually have photos of the next part, but I placed bits and pieces of tatting into the open space to see what would fit. After I had an idea of something that would work, I began filling in the blank area with tatting:
Surprisingly, it was very easy to tat this way. I thought that it would be awkward to work in a confined space, but it went very smoothly! I will definitely use this method in the future.
After I finished up my sample, I realized that I might also be able to use the center from my previous post, with altered stitch counts. I tatted a new center and placed it on top of the light blue doily to see if it would work:
As you can see, the picots on the white chains match up with the flowers in the final round. Many hours later, I ended up with a few small doilies:
These ended up very similar to the small doily in my previous post, as I wanted to keep the same idea and not "lose" that pattern. However, I received a lot of great suggestions on that post, which I've been keeping in mind for future adaptations of this pattern.
Speaking of puzzles, I've also been working on Jane's TIAS. The consensus is that this will be a frog, but I'm still not sure how three beads will be worked into that. I'm anxious to see how it turns out!
Monday, January 4, 2016
Backwards Designing
I've been wanting to experiment with making small doilies and have drawn up some ideas on my iPad. It seems that no matter how much pre-planning I put into a design, it never turns out how I imagined. I'm not really sure how I feel about this one:
I had envisioned it with much smaller flowers and then realized that I had to make them fairly large to get around the circumference of the doily. Even with the larger flowers, it required some stretching to fit. I can get this to work by reducing the chains, but I don't know if I like the proportions. The flowers are too overwhelming.
I think the reason this is so difficult is because it is being designed backwards. I started with the idea of interconnected split ring flowers for the outer round, and tried to design a middle that would match up.
I actually designed backwards for the Frauberger Doily as well, starting with the edging and creating inner rounds to fit. It was tricky then and it is tricky now. I'm always up for a good brain teaser though. Maybe I will have more ideas after I sleep on it.


