Over the past month, I've been sewing fabric face masks. The kitchen table has been temporarily repurposed as a sewing area:
Prior to this, my sewing experience was limited to home economics class in 7th grade. However, I had accumulated most of the equipment needed (from wanting to try different crafts in the past) and just had to take things out of storage. I did need to buy more fabric, some dedicated fabric scissors, and elastic though.
I decided to follow a video tutorial and pattern by Lorrie Nunemaker because I found it easiest to understand as a beginner. I adjusted the pattern a little (slimmed down ear edges) so I could incorporate elastic instead of fabric ties. These masks have a filter pocket, and you can even incorporate a nose wire if you carefully push it through the upper seam of the filter pocket. Here is a batch of masks I made for myself:
Here are some more masks that I made for family members and others who need them:
Although most of my craft time has been taken up by sewing, I have still been working on my mini flake project in tatting. I've now written and tested 20 of the 40 patterns. More updates on that in the coming months.
Wednesday, April 29, 2020
Friday, March 27, 2020
More Minis
I hope everyone is doing okay. I have been staying in and working on my mini flakes. I'm tatting them in light blue, so they can be scanned and put on pattern pages without using too much printer ink (if one decides to print the pattern).
These are done in size 80 DMC Special Dentelles thread, color number 3325. It's surprising just how far one small ball of thread goes. I have tatted 12 mini flakes and might have enough for one more before the ball of thread runs out. I still have plenty of this color left (I bought seven balls from an online retailer called Minerva Crafts in early February), and this project will keep me busy for a while. I ended up designing a total of 40 mini flakes, so I have a lot of diagramming and tatting to do!
Friday, February 14, 2020
Mary and Me
Mary Konior's Queen of Hearts on the left, which inspired me to design the Floral Heart on the right:
Both are tatted in size 80 DMC Special dentelles thread. The dusty rose is color #3688 and the red is color #321.
Happy Valentine's Day everyone!
Both are tatted in size 80 DMC Special dentelles thread. The dusty rose is color #3688 and the red is color #321.
Happy Valentine's Day everyone!
Monday, February 10, 2020
Pastel Hearts and Pattern Update
I've been making more hearts, and decided to add lock chain hangers so I could use them as ornaments.
These are made with size 80 DMC Special dentelles thread, in colors 744, 3325, 210, and 3326.
As I was making these, I adjusted the join location for the first flower, which I think gives a better shape to the heart. I updated the pattern to include a diagram with the new join location, as well as instructions for the lock chain hanger.
For those who purchased the Floral Heart pattern before February 8, I sent out Etsy convos this past Saturday with a link to the new file. The new pattern contains 10 pages whereas the old pattern had 8 pages. If you bought the pattern and have not received the updated file, please contact me.
These are made with size 80 DMC Special dentelles thread, in colors 744, 3325, 210, and 3326.
As I was making these, I adjusted the join location for the first flower, which I think gives a better shape to the heart. I updated the pattern to include a diagram with the new join location, as well as instructions for the lock chain hanger.
For those who purchased the Floral Heart pattern before February 8, I sent out Etsy convos this past Saturday with a link to the new file. The new pattern contains 10 pages whereas the old pattern had 8 pages. If you bought the pattern and have not received the updated file, please contact me.
Thursday, January 30, 2020
Design with me: Floral Heart
I've long admired Mary Konior's "Queen of Hearts" from her book Tatting with Visual Patterns. Ever since I saw the design, I wondered how it was created. I have some ideas, but they are only guesses.
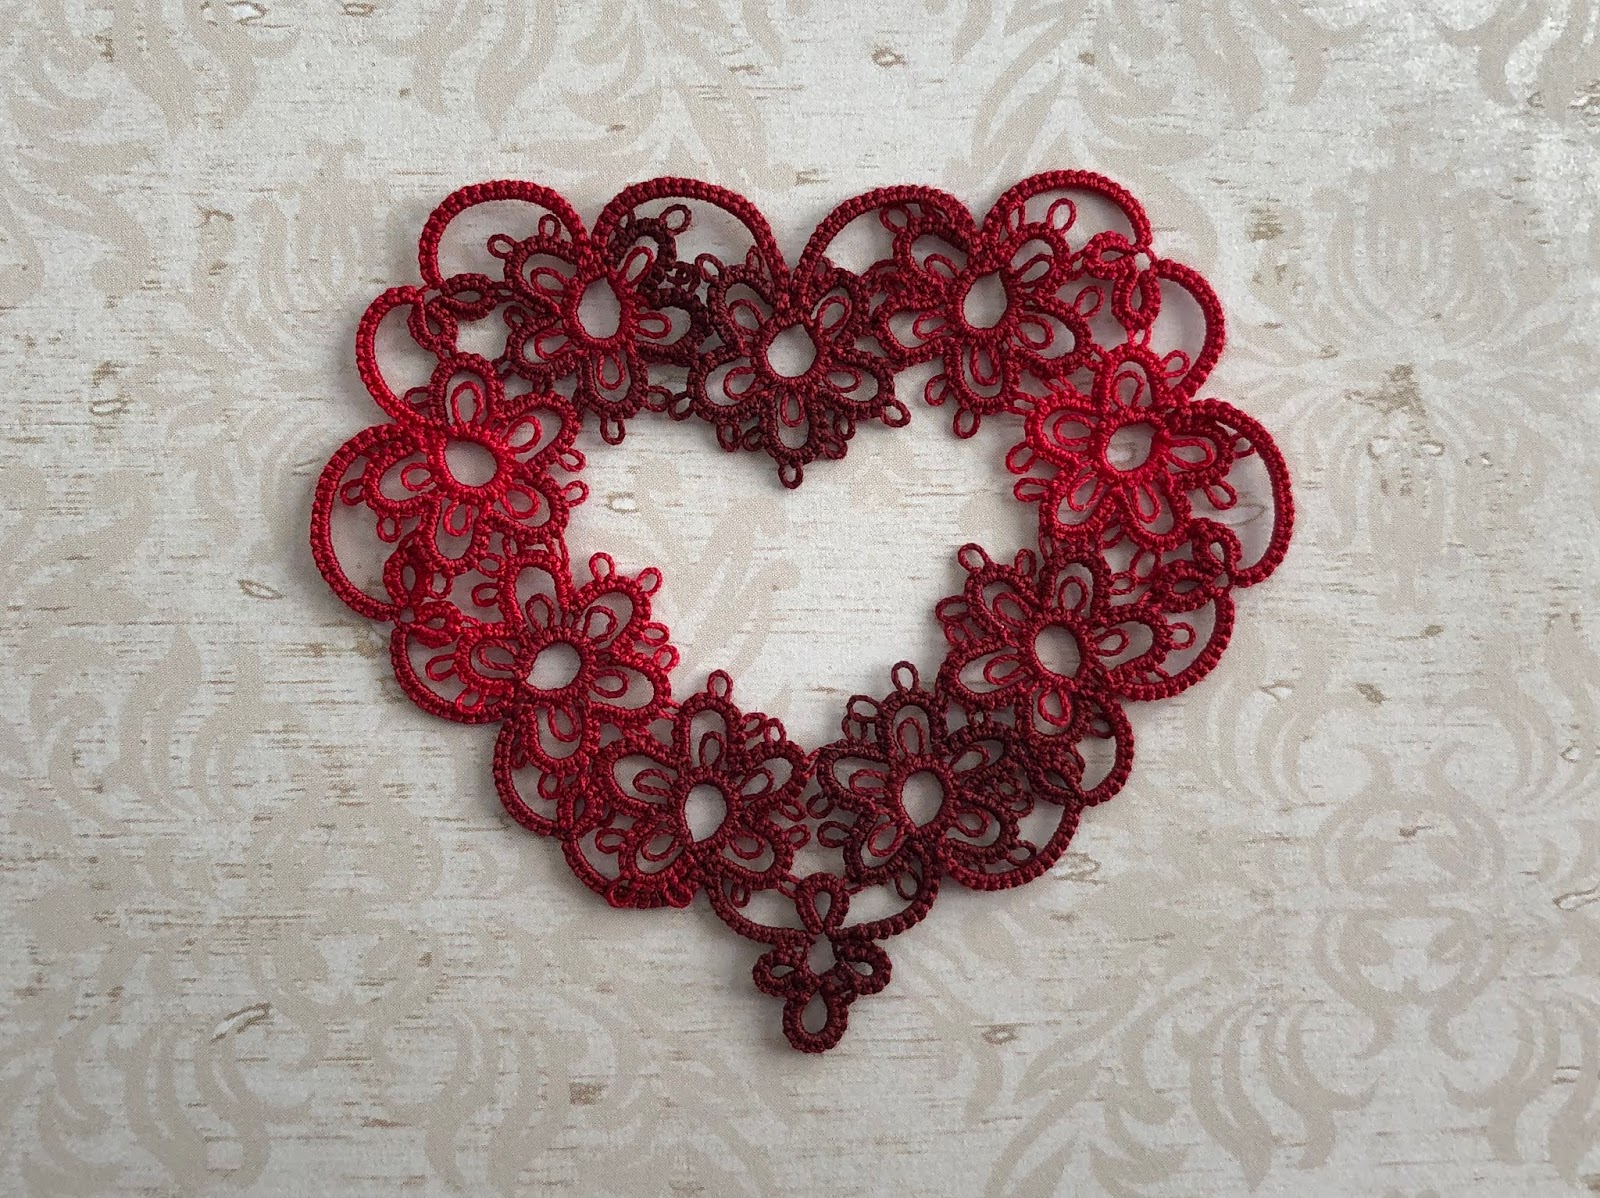
After several years of tatting and designing, I finally gained the confidence to try to recreate Mary's Queen of Hearts, in my own way. In this blog post I will go over the steps that I used to create my design, which I've named Floral Heart:
When I design, I almost always think in terms of basic elements (rings and chains), which can be pieced together to form different types of tatted fragments. Each fragment can be duplicated to form larger pieces of tatting, such as a round in a doily. Below is a photo with examples of tatted fragments. There are five-ringed flowers, six-ringed flowers, trefoils, clovers, onion rings, and many more which lack standardized names:
Mary's Queen of Hearts is composed of a fragment which I have seen referred to as "The Scream" because it is reminiscent of the famous painting. Here is a photo of the Queen of Hearts design, and in the lower right corner is the fragment that makes up the heart:
There are nine of these fragments, all strategically placed and joined together to form the shape of a heart. There is a chain going between each of them, which allows travel from one fragment to the next. The chains also help to form the outline of the heart.
So, how did Mary put this design together? Perhaps she sketched it out on a piece of paper and worked from there. She could have tatted several of these fragments, and placed them together like puzzle pieces to build a heart. Or maybe she simply picked up her shuttles and worked version after version, until she had something that took the shape of a heart.
When designing my heart, I decided to go with the second option: tatting many sample fragments and placing them like puzzle pieces to form a heart. I chose a fragment that looks like a flower with picots, a fairly common shape in tatting. Below is a photo of the fragments:
I tried many different placements, but I found that mimicking what Mary did for her Queen of Hearts worked best. Below you will see nine fragments, positioned in a similar way to Mary's design:
Now, Mary did not have access to an iPad or apps when she built her design, but I do. I love to use my iPad and an app called You Doodle to draw on top of photos. It helps me to visualize where I want to go with my tatting. If you don't have these resources, you might try taping the tatted fragments down on a piece of paper and drawing connecting chains with a pencil. Below you can see that I have drawn connecting chains and other elements to complete the heart:
From here, it is a matter of calculating stitch counts. I tatted a few fragments with extra picots and a long chain, so that I could place them next to each other to see where everything would join up:
I basically held these two pieces in various positions on top of my iPad sketch, and took note of the stitch counts and join locations for all of the elements. It was a painstaking process and took me over an hour to get preliminary stitch counts.
At this point, I was NOT confident that the whole idea would work. I knew I'd end up with something, but I had my doubts that it would look like a heart. Well, I was pleasantly surprised when my first draft came out looking like this:
It was pretty close, and just needed to be cleaned up a bit. I removed the decorative picots on the outer chains, adjusted some joins, and tatted another sample:
This sample looked much cleaner, but still had issues in the lower part of the heart leading to the bottom point. I wanted to slim down the outer edge. I also noticed that the inner negative space could use a little cleaning up, so I went back to my You Doodle app and drew some samples:
On the left is a sample with a cleaned up outer edge and cleaned up negative space. The sample on the right just has a cleaned up outer edge. I decided to tat the sample on the left first. This is the resulting heart:
I was still curious how the sample on the right would look so I tatted that too:
After looking at my tatted samples, I decided to include both options in the final pattern. I tatted a few more versions for test tatting purposes, and to see how it would look in two colors:
And that's the process that I went through to create this heart. My blog post probably makes the whole thing seem more simple than it actually is. It took about 40 hours total, half of which was spent designing and the other half writing and testing the pattern. Keep in mind that I have been designing for several years now, and it has become easier with practice. If I tried to make this heart when I first started out I'm not sure if I would be successful (maybe I would but it would take a lot more trial and error).
Anyhow, I hope that those of you who are interested in design have found this post informative. Maybe some of you can adapt this process to make your own creations. In addition to hearts, I wonder what other shapes can be made in this way? I'm sure this process can be used to make other heart designs. Maybe that is something I will revisit in the future.
After several years of tatting and designing, I finally gained the confidence to try to recreate Mary's Queen of Hearts, in my own way. In this blog post I will go over the steps that I used to create my design, which I've named Floral Heart:
When I design, I almost always think in terms of basic elements (rings and chains), which can be pieced together to form different types of tatted fragments. Each fragment can be duplicated to form larger pieces of tatting, such as a round in a doily. Below is a photo with examples of tatted fragments. There are five-ringed flowers, six-ringed flowers, trefoils, clovers, onion rings, and many more which lack standardized names:
Mary's Queen of Hearts is composed of a fragment which I have seen referred to as "The Scream" because it is reminiscent of the famous painting. Here is a photo of the Queen of Hearts design, and in the lower right corner is the fragment that makes up the heart:
There are nine of these fragments, all strategically placed and joined together to form the shape of a heart. There is a chain going between each of them, which allows travel from one fragment to the next. The chains also help to form the outline of the heart.
So, how did Mary put this design together? Perhaps she sketched it out on a piece of paper and worked from there. She could have tatted several of these fragments, and placed them together like puzzle pieces to build a heart. Or maybe she simply picked up her shuttles and worked version after version, until she had something that took the shape of a heart.
When designing my heart, I decided to go with the second option: tatting many sample fragments and placing them like puzzle pieces to form a heart. I chose a fragment that looks like a flower with picots, a fairly common shape in tatting. Below is a photo of the fragments:
I tried many different placements, but I found that mimicking what Mary did for her Queen of Hearts worked best. Below you will see nine fragments, positioned in a similar way to Mary's design:
Now, Mary did not have access to an iPad or apps when she built her design, but I do. I love to use my iPad and an app called You Doodle to draw on top of photos. It helps me to visualize where I want to go with my tatting. If you don't have these resources, you might try taping the tatted fragments down on a piece of paper and drawing connecting chains with a pencil. Below you can see that I have drawn connecting chains and other elements to complete the heart:
From here, it is a matter of calculating stitch counts. I tatted a few fragments with extra picots and a long chain, so that I could place them next to each other to see where everything would join up:
I basically held these two pieces in various positions on top of my iPad sketch, and took note of the stitch counts and join locations for all of the elements. It was a painstaking process and took me over an hour to get preliminary stitch counts.
At this point, I was NOT confident that the whole idea would work. I knew I'd end up with something, but I had my doubts that it would look like a heart. Well, I was pleasantly surprised when my first draft came out looking like this:
It was pretty close, and just needed to be cleaned up a bit. I removed the decorative picots on the outer chains, adjusted some joins, and tatted another sample:
This sample looked much cleaner, but still had issues in the lower part of the heart leading to the bottom point. I wanted to slim down the outer edge. I also noticed that the inner negative space could use a little cleaning up, so I went back to my You Doodle app and drew some samples:
On the left is a sample with a cleaned up outer edge and cleaned up negative space. The sample on the right just has a cleaned up outer edge. I decided to tat the sample on the left first. This is the resulting heart:
I was still curious how the sample on the right would look so I tatted that too:
After looking at my tatted samples, I decided to include both options in the final pattern. I tatted a few more versions for test tatting purposes, and to see how it would look in two colors:
And that's the process that I went through to create this heart. My blog post probably makes the whole thing seem more simple than it actually is. It took about 40 hours total, half of which was spent designing and the other half writing and testing the pattern. Keep in mind that I have been designing for several years now, and it has become easier with practice. If I tried to make this heart when I first started out I'm not sure if I would be successful (maybe I would but it would take a lot more trial and error).
Anyhow, I hope that those of you who are interested in design have found this post informative. Maybe some of you can adapt this process to make your own creations. In addition to hearts, I wonder what other shapes can be made in this way? I'm sure this process can be used to make other heart designs. Maybe that is something I will revisit in the future.
Subscribe to:
Posts (Atom)