


It didn't take me long to find the perfect book: Tatting Patterns by Lyn Morton. This had all of the techniques I was looking to brush up on: sideways facing rings, chains joined to each other, directional changes, and climbing out from one round to the next.

The first motif, "Rosie," is very simple and good practice for sideways facing rings, as well as for joining the last chain back to the first. I didn't load enough thread onto my shuttles, so I only completed five repeats:

I like Lyn's technique of placing a small picot before beginning the first chain, so that you have something to join back to at the end. I didn't even know that you could make a picot before the first stitch of a chain. This is definitely something I will be using in the future.
The next motif, "Hearts and Flowers," is a bit larger, and also has sideways facing rings. I saw this and wanted to use it to practice connecting chains along a straight line. I had to make sure to keep my tension loose so that my chains did not curve too much:

After this, I decided to try out "Margaret" to practice changing directions while tatting. The directional changes occur in Round 2, to make each of the flowers. There weren't many instructions on how to to this, so I had to figure it out by myself. It wasn't too bad, I just had to remember not to reverse my tatting and to use the shoelace trick before each center ring. As an added bonus, I discovered that the shoelace trick makes enough of a gap to be used as a place for joining.

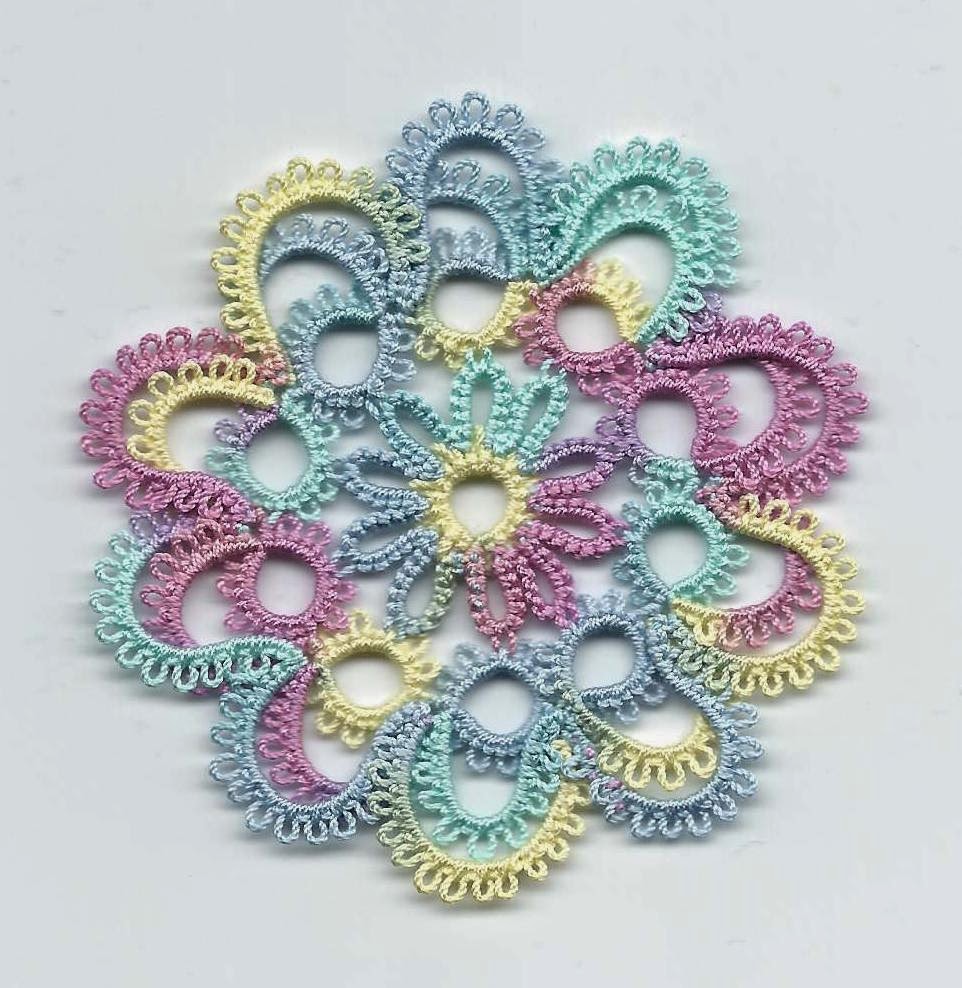
Lastly, I tatted the "Flat Flower Motif" which utilizes sideways facing rings and climbing out to another round. The spaces between the rings and chains make a good join location for the last round, so no extra picots needed here. I blocked this one very crudely by smashing it down with a wet paper towel and letting it dry on a paper plate. I have a blocking board and rust proof pins, but rarely have the patience to use them :)
All in all, tatting motifs from a book is much easier than designing, but I also find it to be more boring and less fulfilling. I wonder how long I will continue tatting from books before I become tempted by the thought of making a new design...
7 comments:
They all came out great looking and I go back and forth between making my own and books all the time, I find I look for harder and harder patterns to work, so it is not so boring!
Robin, I do like them all ! As always, your tatting is a visual pleasure :-)
I enjoy working on patterns from public domain as a way to learn new techniques, to perfect my own skills as a tatter, just for the sheer pleasure of reproducing a beautiful pattern, and may be for an AHA moment thrown in ;-))
Looking forward to what your current learning will produce in terms of your own patterns :-)
Thank you both :)
There are so many different techniques, I suppose one can never truly become bored with all of them. I wish I could learn everything faster though...so many new things I'd like to try out :)
I do love that book! Maybe it's time to revisit it. I love the colors you've used, and your tatting looks perfect!
Thank you for reminding me that I have to READ my books!. TRhank you for the tutorial as well, which I'll read as soon as I have time!
All your tatted pieces look so wonderful!!! I love the colors you used!!! :)
Thanks everyone!
Post a Comment