


Feel free to skip this post if you already have a beading technique that works for you. I know many people like to secure beads onto long picots with safety pins or paperclips. Using a picot gauge is probably more for people who enjoy working with numbers and basic formulas. I'm writing about this technique to provide a mathematical option, as well as to have a place to jot down my notes (I know I will lose them if I don't add them here).
Choosing Beads
First, let's talk about finding the right type of beads for a pattern.
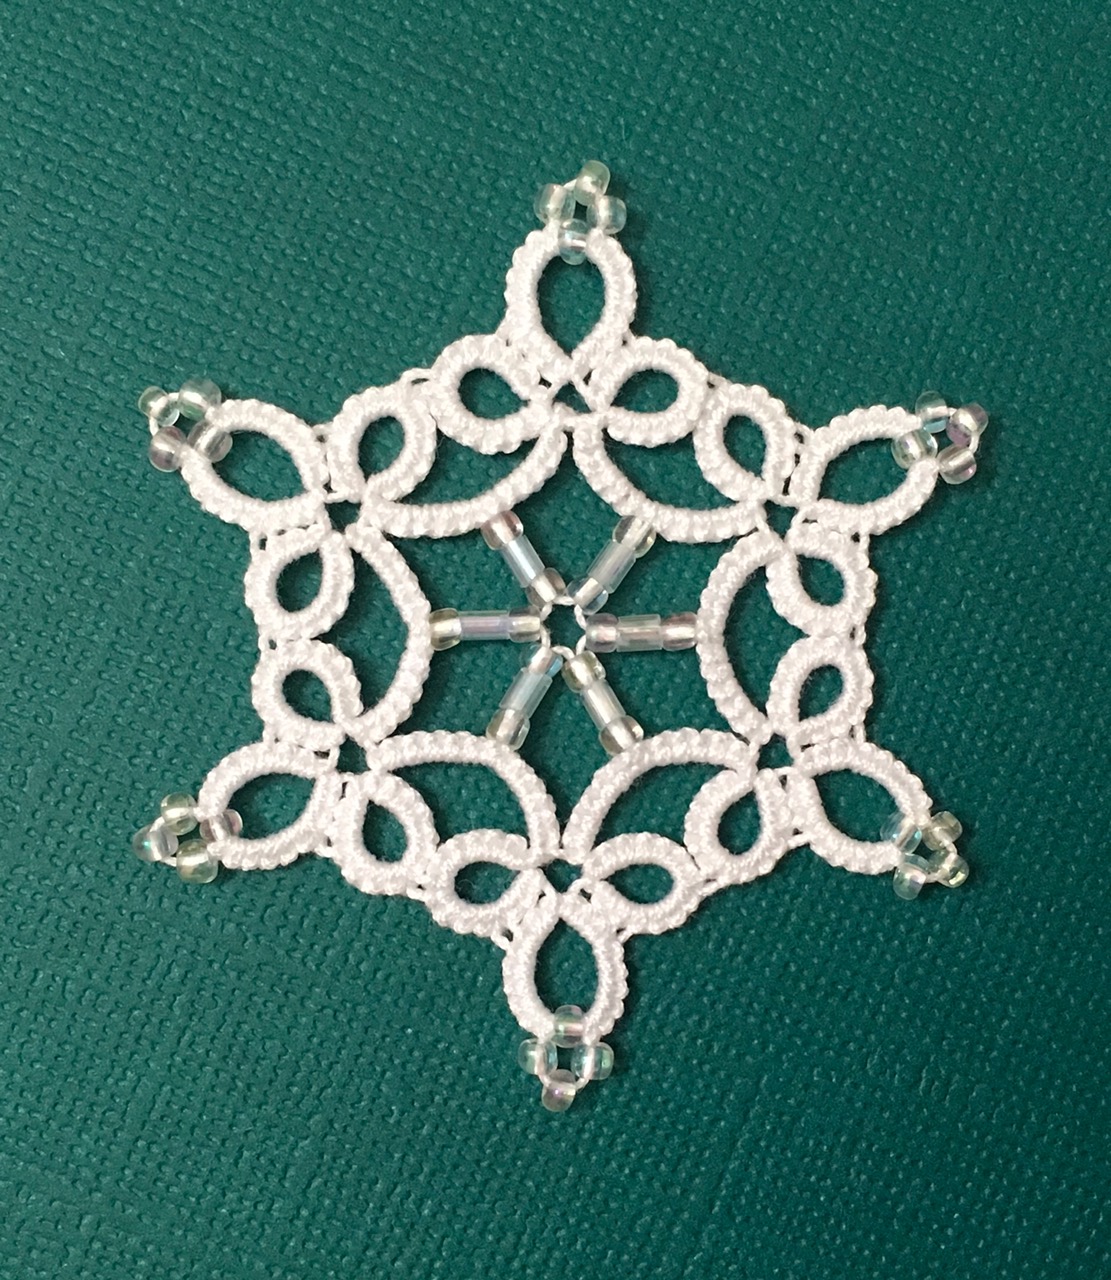
Some patterns are written with specific beads in mind. If you have those beads on hand, great! If you don't, you can substitute other beads as long as they are the same height. I'm going to use Jane Eborall's Small Bugle Bead Snowflake as an example. She uses bugle beads that measure 1/4 inch in height. I didn't have that size bugle bead, but I found that a combination of one small bugle bead and two seed beads also measured 1/4 inch tall. Here's how they look in the center of the snowflake:

Some patterns don't have beading instructions, but contain an empty space where beads could be added. For these patterns, tat a sample without beads first. Then, place a bead onto the end of a thin crochet hook and hold it up to the tatting. Try different beads until you find one that looks like it will fit.
The following examples are patterns where I added a beaded center, but you could also use this technique to add single beads.


Here are the finished snowflakes and star with beaded centers:

If you have a very large central space, a combination of several types of beads (such as one bugle and one seed bead) would also work.
Orienting a Gauge
Before I get into any calculations, I'd like to talk about the different ways to hold a picot gauge. One way to hold a gauge is to lay it above the double stitches. The picot is measured vertically, by looping the thread up and around the gauge. The core thread isn't involved in the measurement, and remains below the gauge. A vertically measured picot will always be the same height as the gauge. In the example below, both the picot and gauge are 5 mm tall:

This is how I hold my gauge, and all of my calculations will be based on measuring the picot in this way. I prefer to measure my picots vertically because the gauge is smaller (half the size of a gauge that measures horizontally), and when the gauge is removed, the picot is fully formed.
You can also use a gauge to measure a picot horizontally. For a horizontal measurement, the gauge is held against the end of a double stitch, and new stitches are formed on the other side of the gauge. The core thread runs along the front of the gauge, while the picot thread runs along the back:

After the gauge is removed, the stitches need to be slid into place to create a fully formed picot. Sliding the stitches causes the picot thread to double over, thus reducing its height by half. Therefore, in order to to produce a 5 mm tall picot, you would need to use a 10 mm wide gauge.
I don't recommend measuring very long picots horizontally. The gauge becomes unwieldy and it is difficult to slide the stitches into place. For example, to create a 32 mm tall picot you would need to use a 64 mm wide gauge. It's much easier to just use a 32 mm tall gauge to measure the picot vertically.
Calculating Picot Height for a Single Bead

In this example, figuring out the height of the long beaded picot is easy. Simply take the height of the bead, and then add 1 millimeter extra for joins. Expressed as a formula:
bead height + 1 mm extra for joins = picot height
In the example above, I used 4 mm Swarovski crystals. Therefore:
4 mm tall crystal + 1 mm extra for joins = 5 mm tall picot
(Some beads are not as uniform as Swarovski crystals. When working with bugle beads, seed beads, or other unevenly sized beads, you will need to measure each bead with a ruler before making any calculations. If you are using several beads on each picot, "bead height" will refer to the height of the entire group of beads).
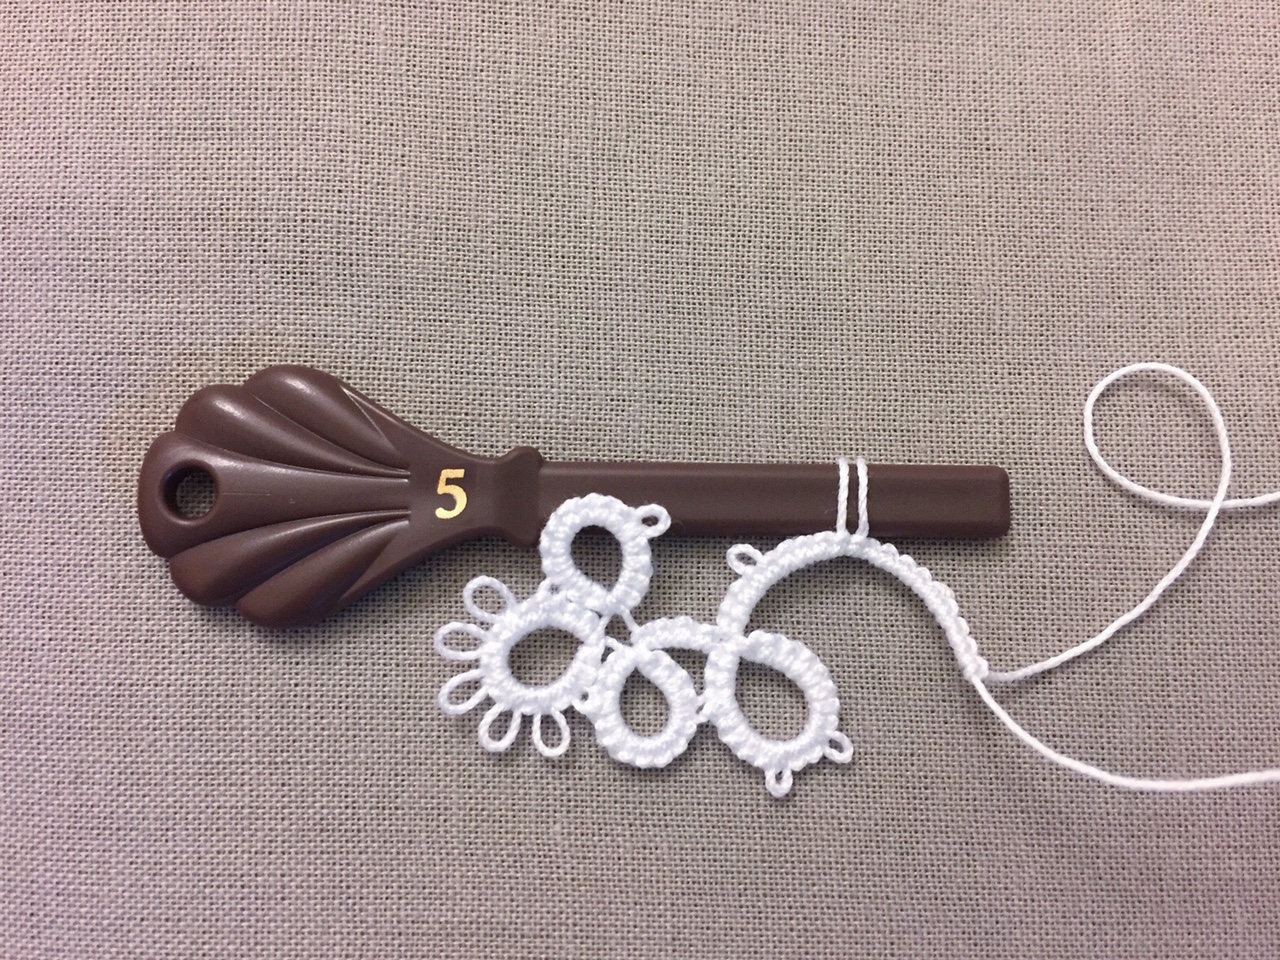
To create a 5 mm tall picot, I used a 5 mm gauge that measures picots vertically. Here are the first two picots formed on the gauge:
After attaching the first crystal, I found it easier to reorient my gauge and measure my picots horizontally. This is because the crystals started getting in the way:

Notice that I had to double the size of my gauge to 10 mm to measure the picot horizontally. Remember that a horizontally measured picot will double over and become half its height, so a 10 mm gauge is required to form a 5 mm tall picot.
Here is a photo after the gauge was removed and the stitches were slid into place:

Calculating Picot Height for a Group of Central Beads
Adding a group of central beads to one long picot was first described by Joëlle Paulson in her Crystal Star tatting pattern. Joëlle uses a 52 mm gauge, which measures the picot horizontally. You can see a video of her using this technique by clicking here.
Jane Eborall later described a similar technique that uses safety pins (rather than a picot gauge) to hold each bead in place. You can read more about her technique by clicking here.
I recommend trying out both techniques to see which works better for you. If you find that you prefer using a picot gauge and would like to know how to calculate the height of the long beaded picot, continue reading below.

To calculate the height of the long beaded picot, we need a few pieces of information:
- The height of the beads
- The number of spokes in the center (ex: a star has five spokes, a snowflake has six spokes)
- An amount of extra thread for each spoke, to accommodate for joins and space between beads
I'll talk about #3 more specifically: For each spoke, 1.3 mm extra picot height is needed to accommodate for joins and space between beads. If you pull your thread very tightly, you can reduce the extra per spoke down to 1.2 mm (this is what Joëlle Paulson uses in her Crystal Star pattern). For my calculations, I will be using 1.3 mm, as this number works well for me.
Update: When I first published this post, I forgot to add that all of my experiments were done with Lizbeth size 20 thread. The extra per spoke will be different when using smaller threads. For size 40 or smaller thread, use 0.9 mm extra per spoke. Please click here for more information.
When working with size 20 thread, the formula to calculate the height of the long beaded picot can be expressed in the following way:
Combined height of beads + (1.3 mm extra for joins * number of spokes) = picot height
Measurements will be a little bit different depending on the type of bead being used. In an effort to make everything clear, I'm going to go over sample calculations for the following three bead types:
- Swarovski Crystals (can be applied to other uniformly sized beads)
- Bugle Beads (can be applied to other beads with slight size discrepancies)
- Bead Stacks (can be applied to groups of beads)
I recommend reading over all of the examples, especially if you are planning to use irregularly sized beads such as bugle or seed beads.
Sample Calculations for Central Beads
Swarovski Crystals
Swarovski crystals are uniformly sized, so calculating the height of the long beaded picot is fairly straight forward. In the snowflake pictured below, I used six Swarovski crystals, each measuring 4 mm in height.

Again, here is the formula for calculating the height of the long beaded picot:
Combined height of beads + (1.3 mm extra for joins * number of spokes) = picot height
Let's go over each part in detail. First, we are going to add up the height of all of the beads in the center of the pattern. In this case there are 6 beads each measuring 4 mm in height. That gives us a combined height of 24 mm (6 beads * 4 mm).
Next, we need to figure out how much extra to add for joins and space between beads. As I mentioned before, I like to add 1.3 mm extra for each central spoke. This pattern is a snowflake, so it has 6 spokes. Therefore, 1.3 mm extra * 6 spokes = 7.8 mm extra.
Now, let's add the two numbers together:
24 mm combined bead height + 7.8 mm extra for joins = 31.8 mm picot height
For the purpose of creating a gauge, round 31.8 mm up to 32 mm. Make sure you measure the picot vertically (if you are measuring the picot horizontally, you will need to double size of the picot gauge to 64 mm).
A 32 mm gauge will work for any snowflake that uses six 4 mm Swarovski crystals in the center.
Bugle Beads
Unlike Swarovski crystals, bugle beads are inconsistently sized. For this reason, it is imperative that you select the exact beads you will be using in the center. You will need to string these beads onto a piece of spare thread, and measure the total length of the bead group with a ruler:

After you measure and make calculations, you can pull the beads directly from this spare thread and add them to your tatting. It's tempting to take an average height of the bugle beads to use in future patterns. Unfortunately, the beads vary enough in size that you must measure each group individually, as tedious as it may be. I've tested using averages and it just doesn't work!
Let's use the bead measurement above in a sample calculation. Again, the formula will be:
Combined height of beads + (1.3 mm extra for joins * number of spokes) = picot height
In the photo above, the group of beads measures 27 mm. Entered into the formula:
27 mm combined bead height + (1.3 mm extra for joins * 6 spokes) = 34.8 mm picot height
For the purpose of creating a gauge, round this up to 35 mm. Make sure to measure your picot vertically (if you are measuring your picot horizontally you will need to double the size of the gauge to 70 mm).
Here is a snowflake made with a bugle bead center:
Here is a snowflake made with a bugle bead center:

Bead Stacks

(Please note: If you are working with uniformly sized beads such as Swarovski crystals, you don't have to string and measure them. Instead, use multiplication to calculate the height of the bead group. For example: 12 Swarovski crystals measuring 4 mm each will have a combined height of 12 * 4 = 48 mm).
In the example pictured above, I used a combination of two seed beads and one bugle bead for each central spoke. These beads were added to the center of Jane's Small Bugle Bead Snowflake.
The measurement of the entire group of beads is 1.5 inches (I guess I forgot to take a photo showing the ruler in the millimeter position). Converted into millimeters, the bead group measures 38.1 mm, which can be added to the formula:
Combined height of beads + (1.3 mm extra for joins * number of spokes) = picot height
38.1 mm combined bead height + (1.3 mm extra for joins * 6 spokes) = 45.9 mm picot height
Round 45.9 up to 46 mm to create a picot gauge. Measure your picot vertically (if you measure your picot horizontally the gauge needs to be doubled to 92 mm...yikes).
Here is the finished snowflake:
That's all for today's post. If you've gotten this far, and you have any questions, feel free to contact me or leave a comment below. I'm looking forward to using these techniques to add beads to patterns in the future, and hope that this information comes in handy for others as well.
5 comments:
Thanks for this very informative post! I'm bookmarking it so that I can easily access it again!
Very interesting post. I will be coming back to re read this again. Thank you for spending the time to write a very interesting post on beads
Excellent post and diagrams ! Now that discussion can be laid to rest ;-D I've added your link to my resources page - good reference.
btw, check out Jennifer Williams' diagrams and explanation, too - I came across it last week. She,too, talks about the gauge in relation to the core thread like I'd done.
Sorry, one more point which I might have missed, but please check - I assume your measurements here are for size 20 thread - when you speak of the extra length to be left for joining ? Or does that length not change with thread size ?
Good point muskaan, it had completely slipped my mind to add information about the thread size! Yes, these experiments were done using size 20 thread. Last year, I had done a few experiments with smaller threads and the extra per spoke does need to be reduced a bit. I think I was using something like 1 mm extra per spoke for size 80 thread and central beads. It's definitely something that needs more experimentation. Tomorrow, I'll see if I can find a good spot in this post to add information about the thread that I used.
Post a Comment